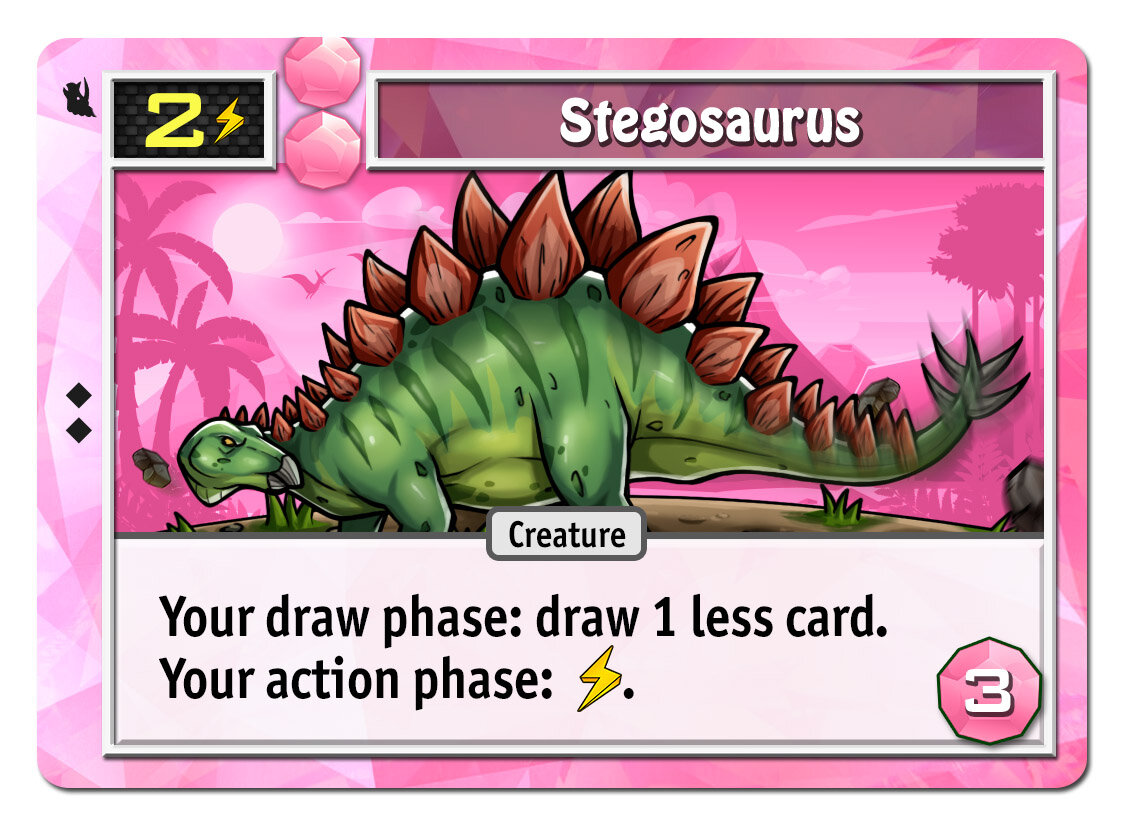
Puzzle Strike 2’s expansion, called Bold Adventures, has four new community bank decks as well as 10 more characters. The fourth of these bank decks is Puzzle Pets.
The creatures are the star of the show in Puzzle Pets. In Puzzle Strike 2, creatures give you access to ongoing effects, meaning they stay on the table indefinitely (giving you a bonus) until they are destroyed. Most decks have a few creatures, but Puzzle Pets puts the emphasis on creatures.
Puzzle Pets creatures have a special mechanic to level up (or “evolve”). Each of the four colors has a level 1 creature that’s common in the community deck. For example, here’s Crattle, purple’s level 1 creature:

Crattle costs 1 action to play. Just below that, his card shows that it costs 2 actions to upgrade him (to become level 2). You can’t upgrade a creature the same turn you play it, so you’ll have to wait until the following turn. When you do upgrade a creature, you fetch the level 2 creature of the same color from a side deck of cards and put it on top of your level 1 creature, replacing it.
Here’s the purple level 2 creature, Crashoban:

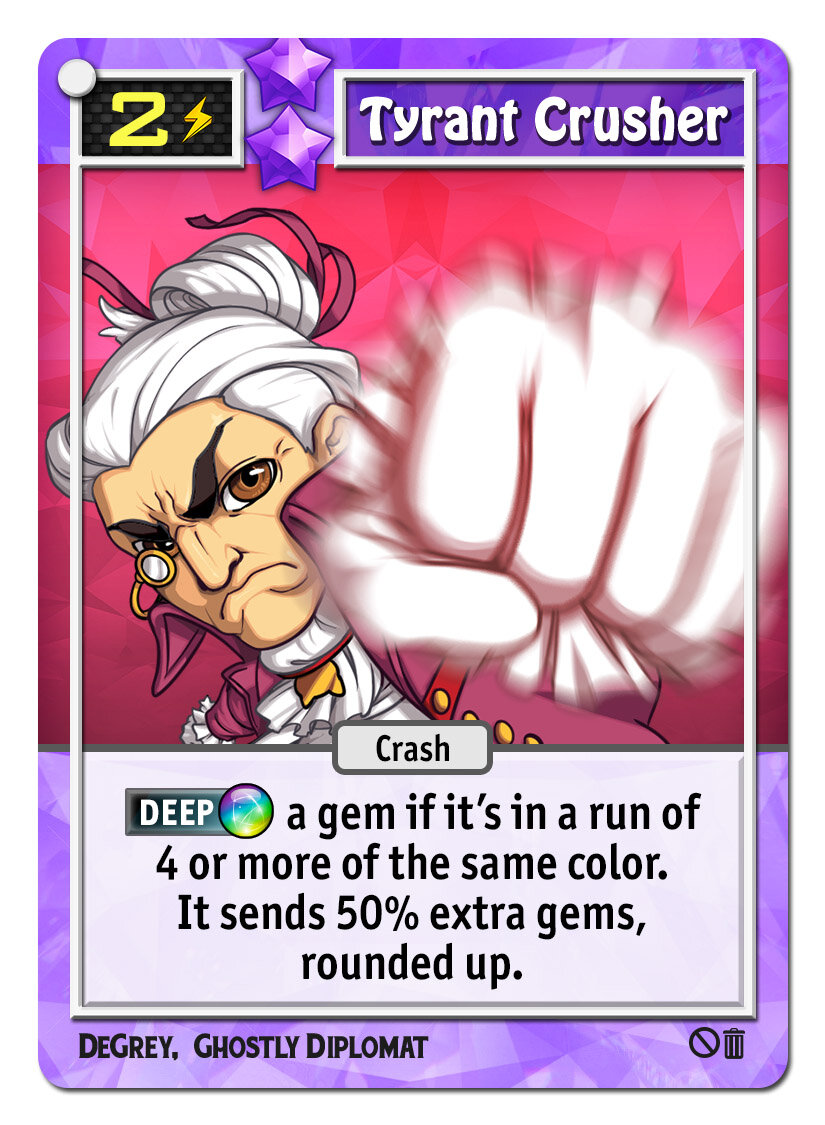
Crashoban’s ability is somewhat similar to Crattle’s, but Crashoban’s is much more powerful. Normally, when you crash only a single gem (rather than a run of multiple same-color gems) you don’t get the height bonus at all. For example, suppose you have 12 gems in your gem pile and you’re trying to dig yourself out to survive. Imagine that your top three gems are all different colors, so getting rid of the top two will (unfortunately) require two different crash gems. Normally, crashing the first will send 1 gem to opponents, and crashing the second gem will send another 1 gem, for a total 2. But if you had Crashoban, you’d get a +4 height bonus for each of those, meaning you’d send 10 in total. It’s so strong that you can realistically win the game with Crashoban.
You can upgrade Crashoban to level 3, and his card shows that it costs 2 actions to do so. You can’t upgrade him to level 3 on the same turn that you got him to level 2, so you’ll have to wait a turn at least. Once you do upgrade Crashoban, just flip the card over. On the back, you’ll find purple’s level 3 creature, Crashizard:
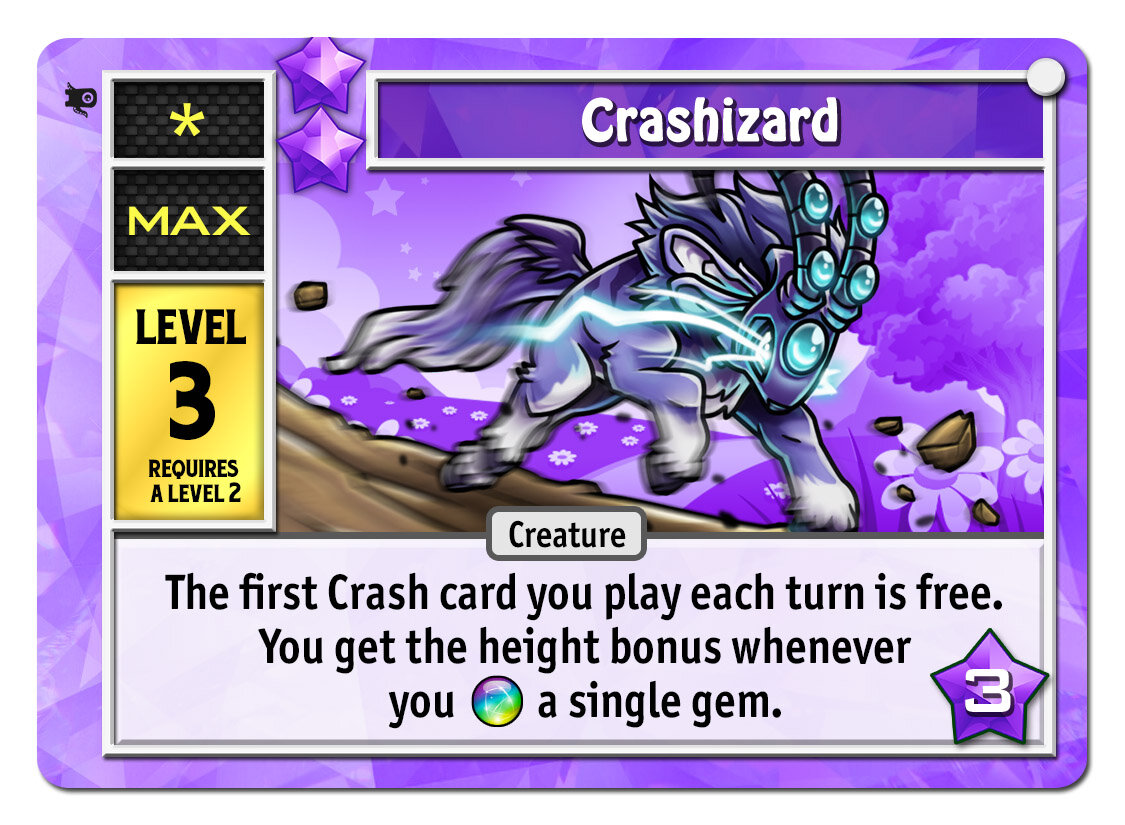
Crashizard has the same devastating ability as Crashoban PLUS you also get to pay 0 actions for your first crash gem each turn. That’s super scary for your opponents.
Let’s look at what the other colors’ creatures have to offer. Here are the blue creatures:


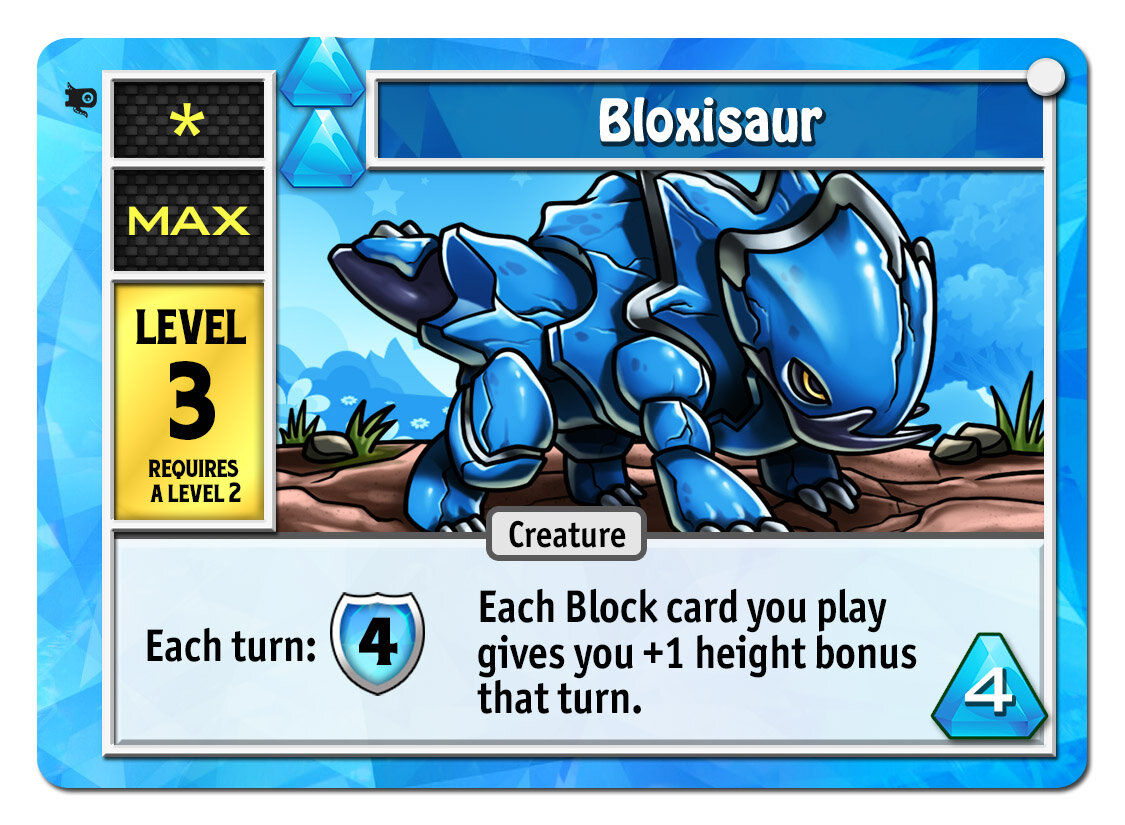
The blue creatures are very cheap to play. The level 1 creature costs 0 actions and each level up costs only 1 action. These creatures are great defense, helping you stay alive, and then the level 3 creature helps you actually win with his height bonus ability.
The pink creatures are much more expensive:
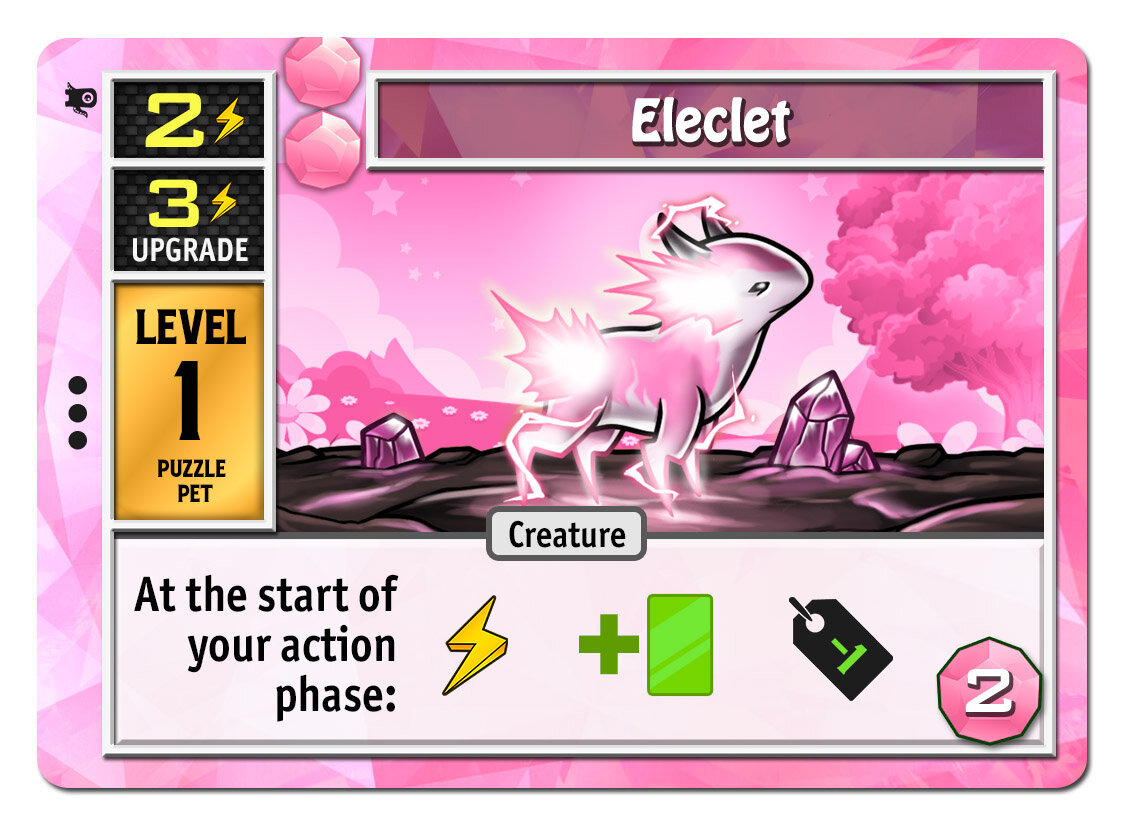


The level 1 creature costs 2, but it gives you an extra action (among other things) at the start of every subsequent turn. That’s huge. It then costs 3 actions to upgrade, which is a lot, but the extra action from the level 1 creature helps there. Upgrading to level 2 then gives you TWO extra actions per turn, plus some great card draw. If you can get to the level 3 Electromekimus, it’s just ridiculous. When you get 3 extra actions and 3 extra cards per turn, you can do practically anything.
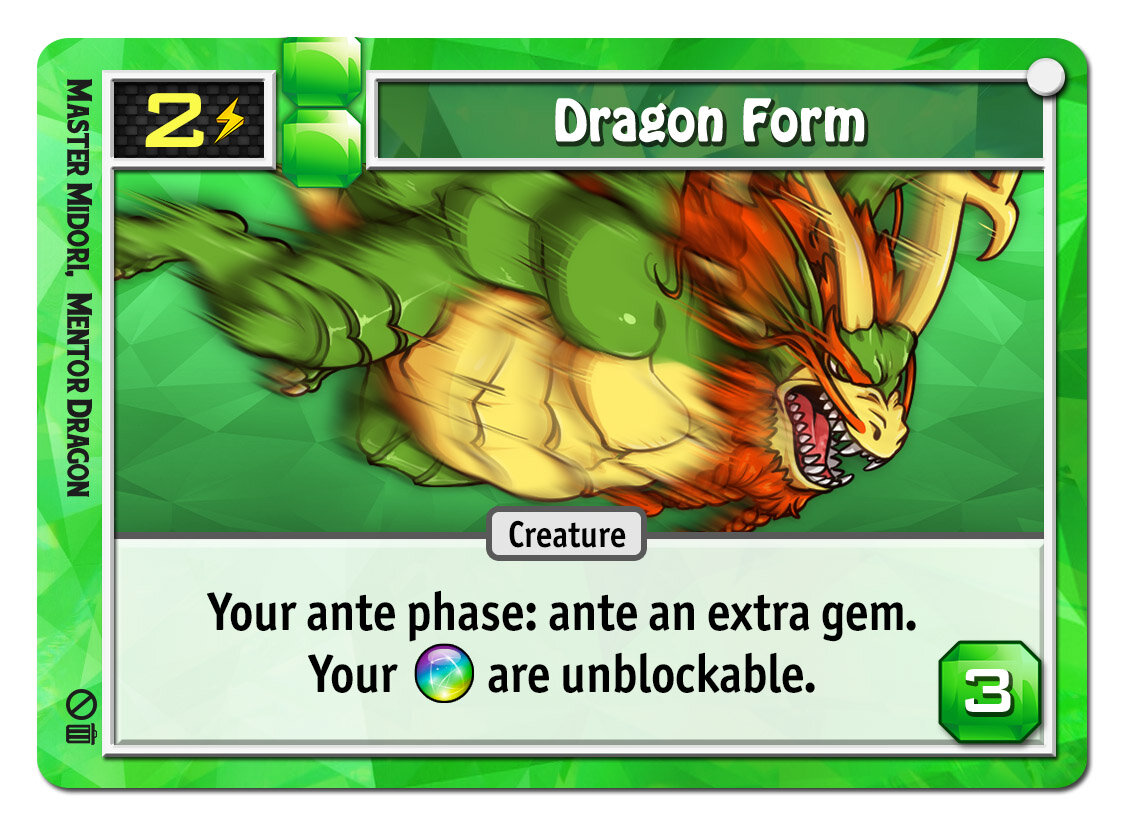
The green creatures are the masters of swaps:

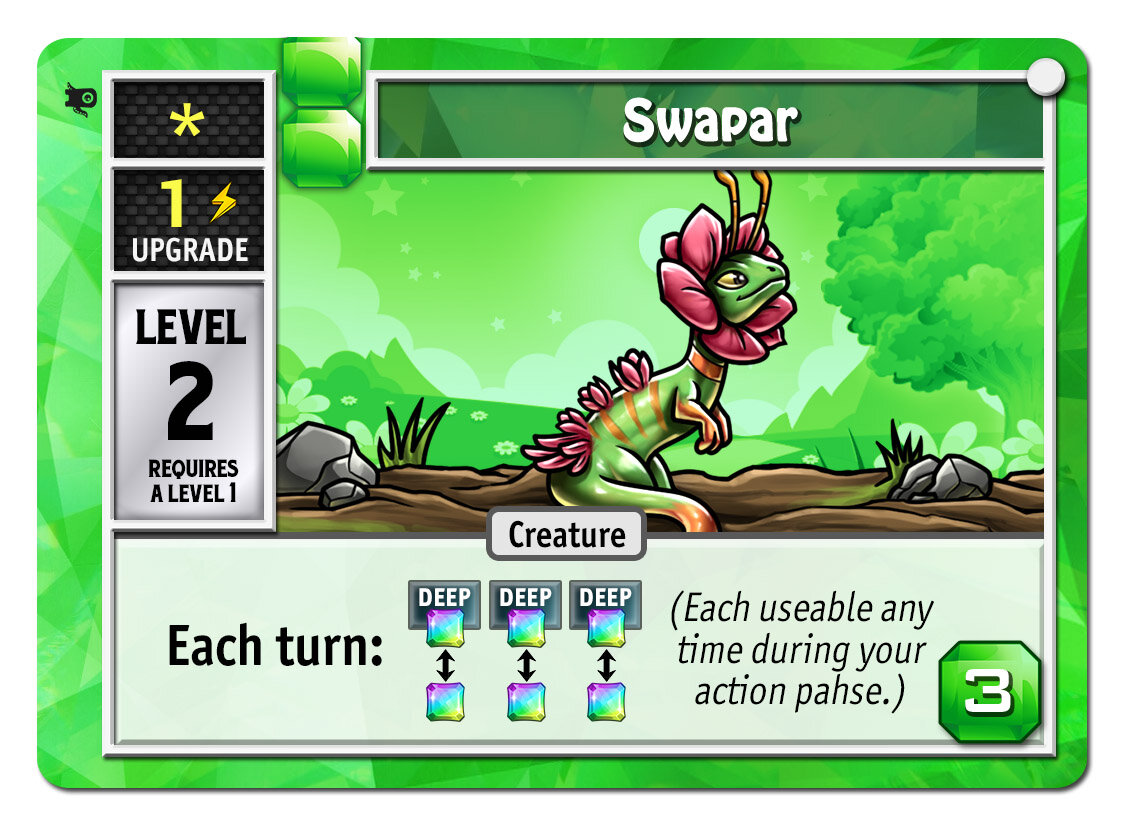

Your starting deck comes with a basic swap card that costs 1 action and gives you up to 2 swaps. The level 1 green creature also costs 1 action, but gives you 3 swaps…every single turn! Upgrading to level 2 turns those into deep swaps, which is incredibly powerful (that means you can swap any two gems in your gem pile, not just adjacent ones). The level 3 Swapogoyf has that same ability, plus he lets you trash up to 3 cards in your hand each turn. That lets you slim down to only your most powerful cards.
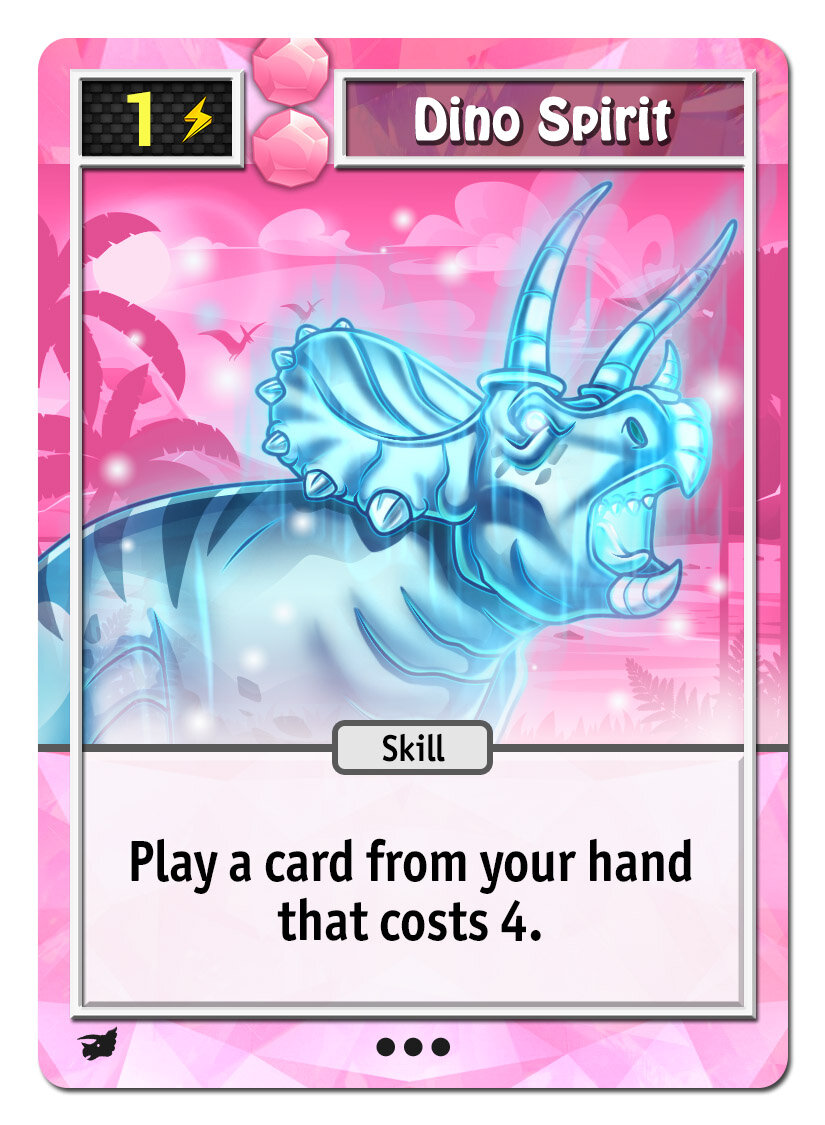
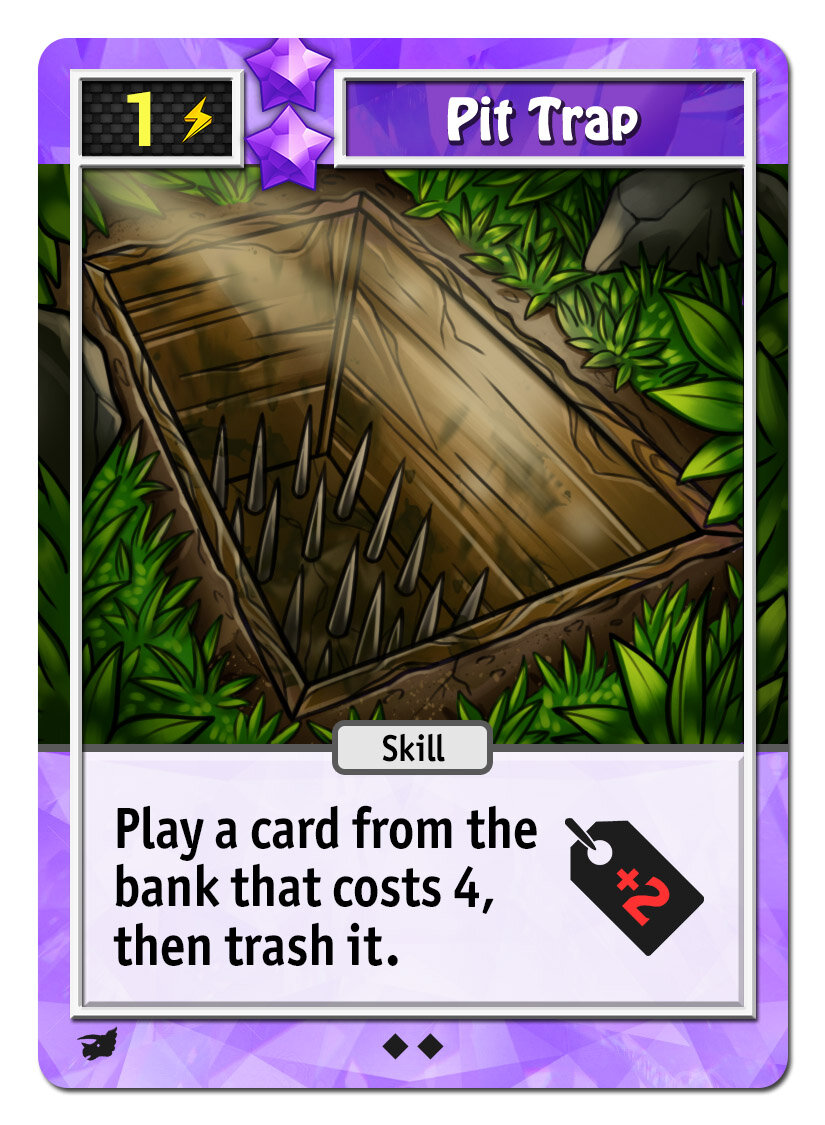
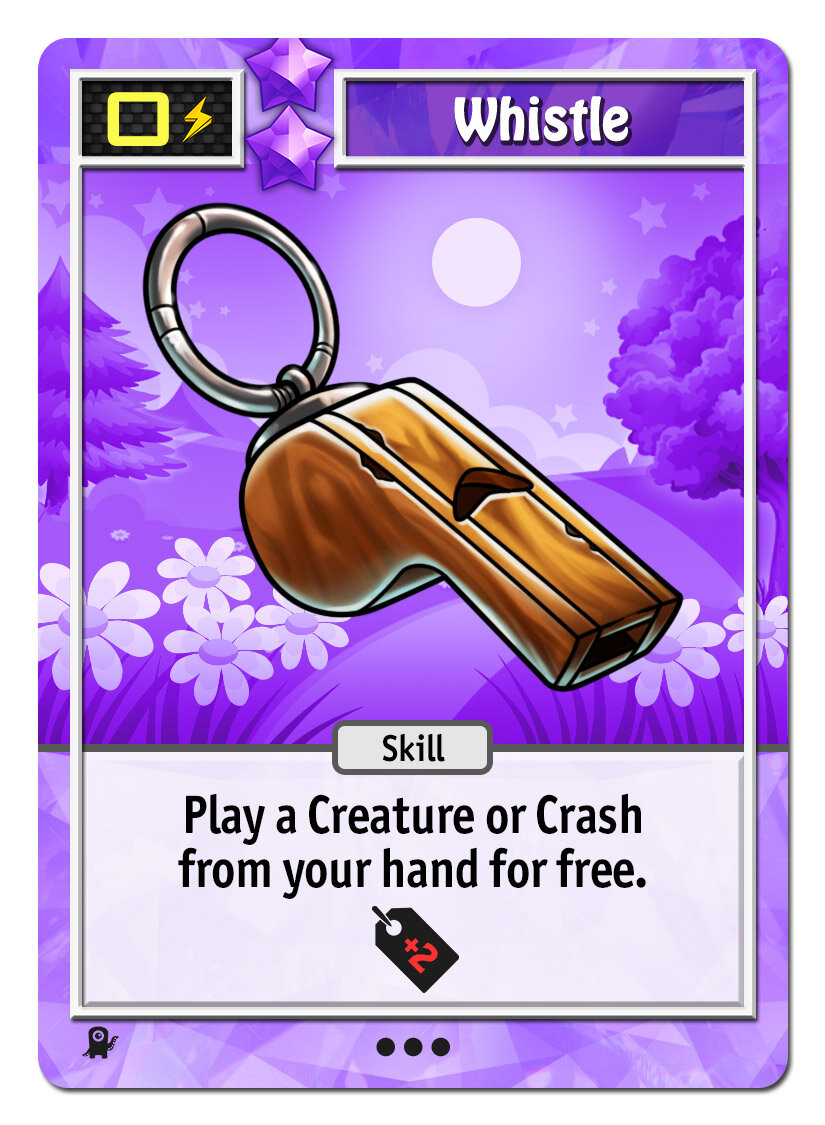
If you need help getting creatures into play, try these:


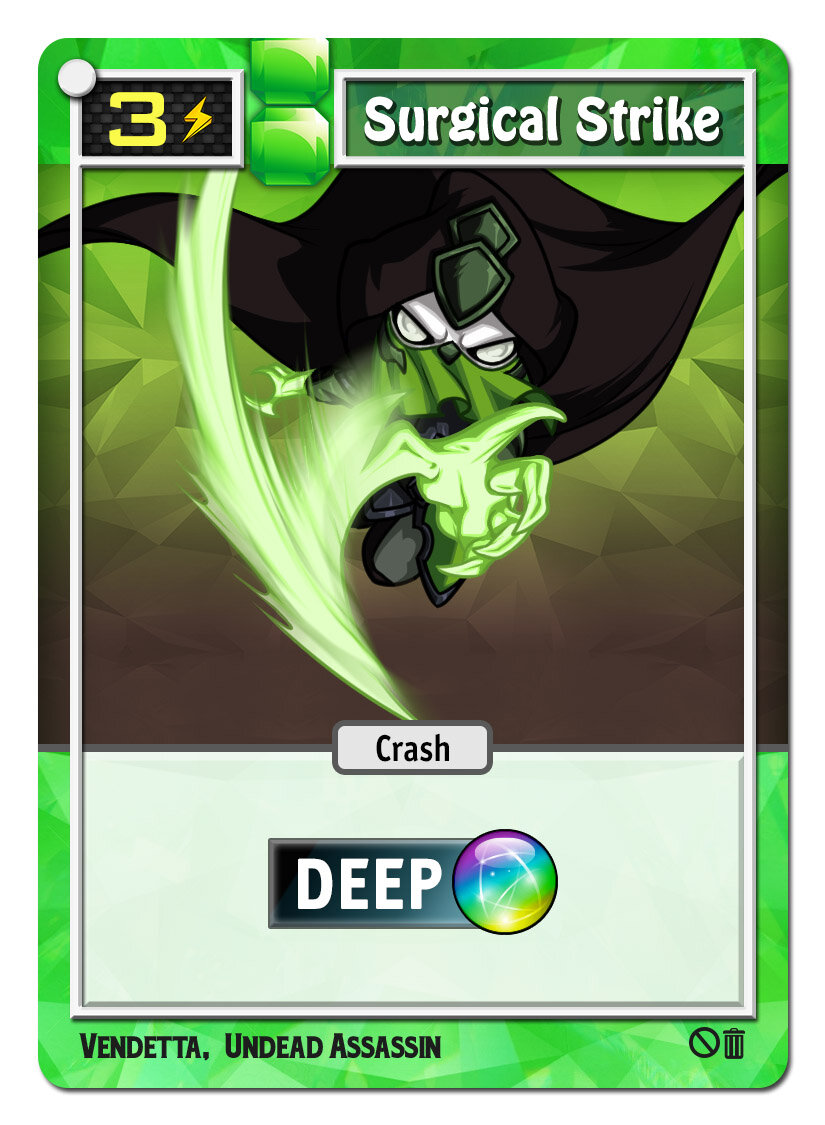
Don’t be afraid to put more than one creature in your deck. You can only have one in play at a time, but they can be destroyed when an opponent crashes the number of colored gems listed on the lower right of your creature card. They might also destroy your creature with this:
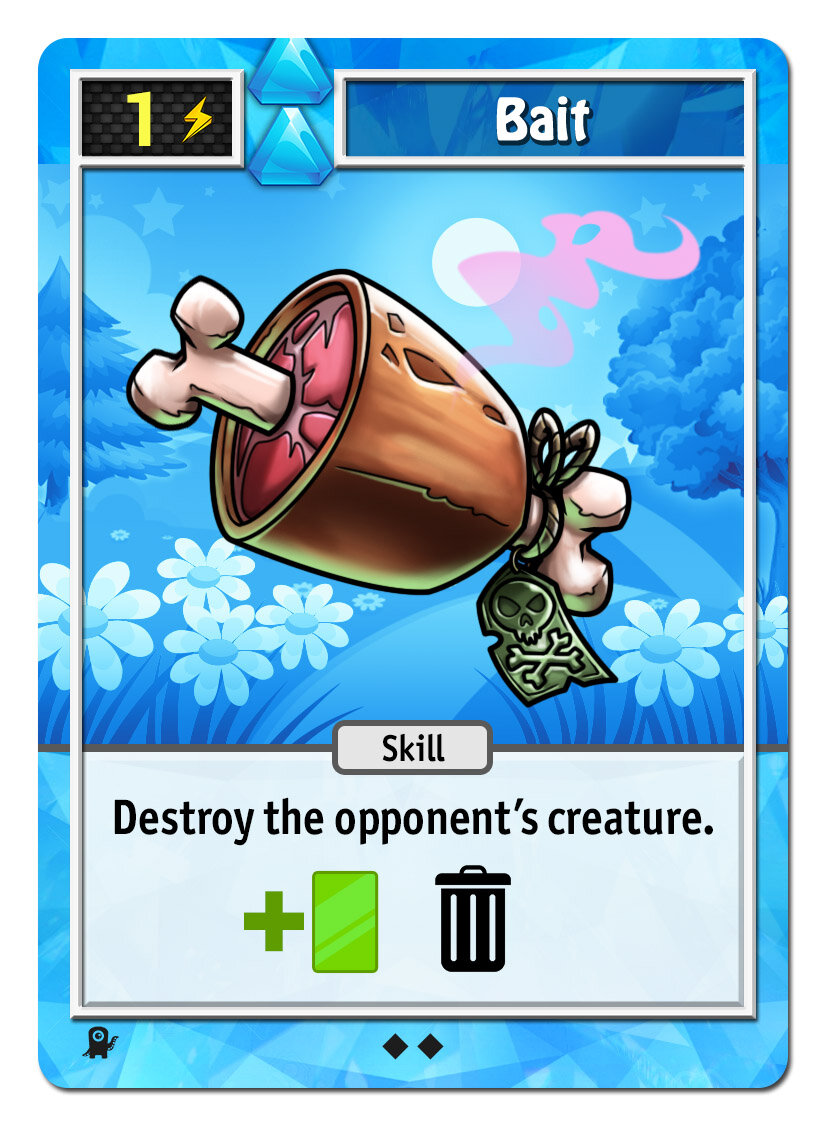
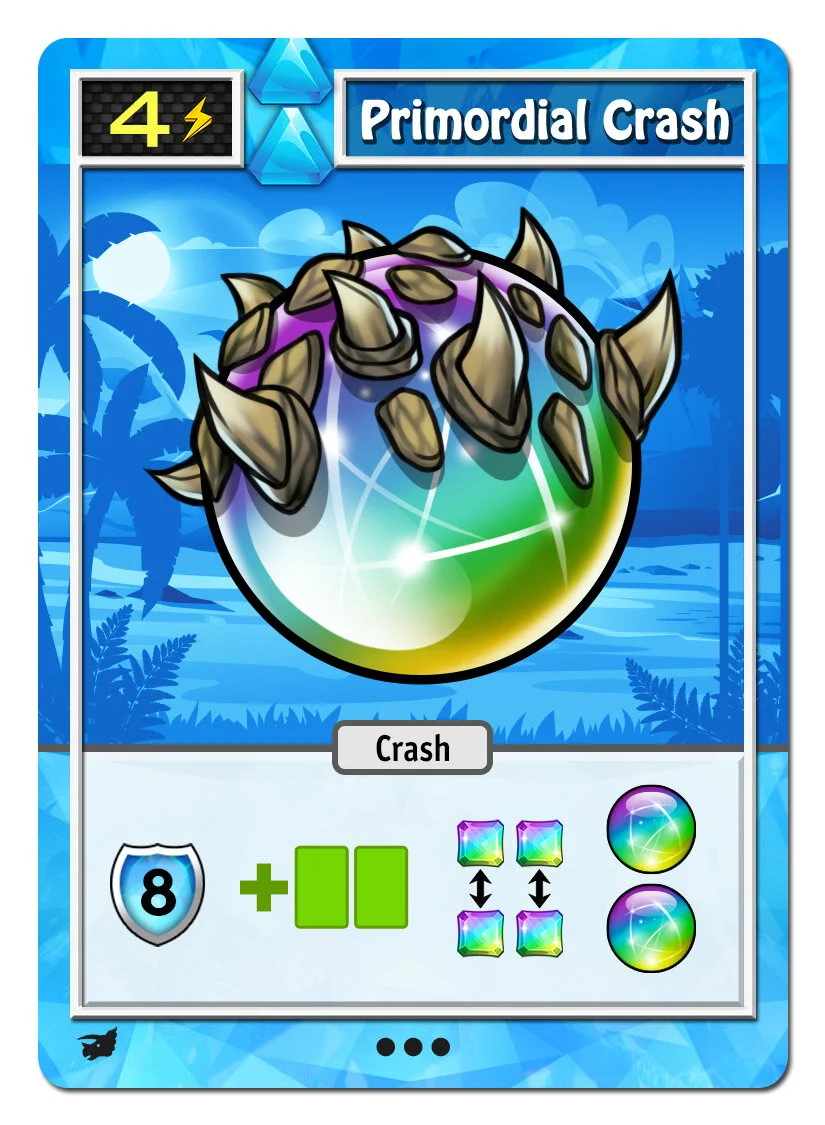
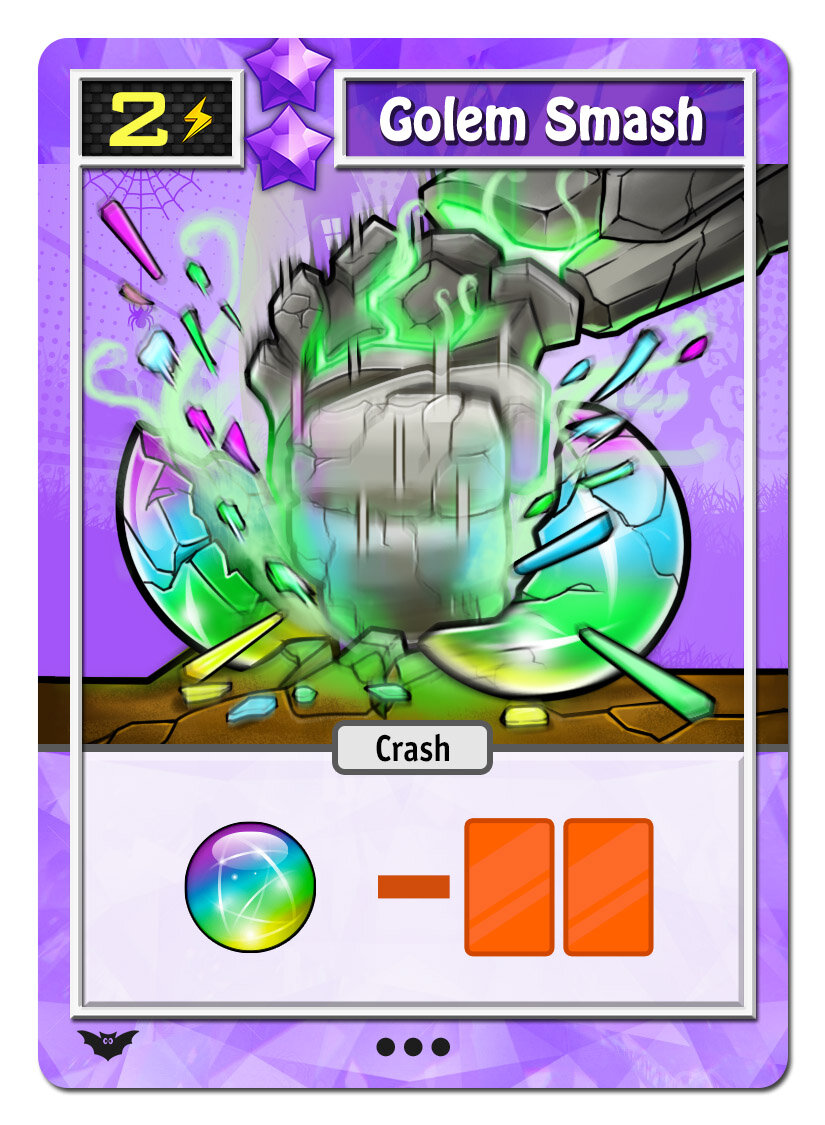
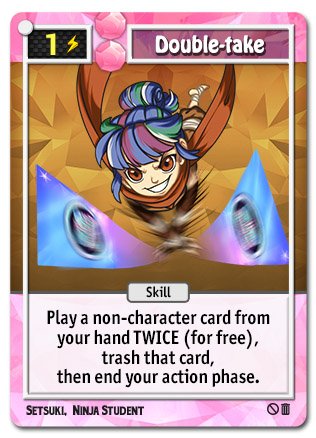
Anyway, if you have multiple creatures in your deck, this becomes a powerful tool:

Just 1 action for a double crash!
There’s more in Puzzle Pets, but that gives you a good tour of it. Creatures are a somewhat minor mechanic in other decks, so this one is a much different experience. Get a level 3 cutie into play and ride it to victory!